
How to Make Your Squarespace Contact Form Look on Brand

Those of you who have hung around here a while know I LOVE Squarespace. Seriously, I think it’s an incredible tool.
Whether you hire a designer or choose to DIY it, Squarespace allows you to simply and easily create beautiful and functional websites.
But Squarespace lets itself down on its Form Blocks. Not it’s function. No, I love the versatility of the block and just how easy we can set it up and link your email address. But the design can look, well, a little ugly to be honest.
Whilst everything on your Squarespace website looks so clean and modern, these contact forms are lacking a little pizzazz.
If you’re looking to make your site look more on brand and unique, you’re probably going to want to customise your contact form.
Unfortunately, your body font will be used as the default text on your form and the only thing you can change in the Style Editor is the submission button. It’s a start. But Squarespace wizards, we want more!
However, with a few lines of CSS code, you can transform the look of your Squarespace form. It’s not as scary as it sounds, promise!
Today we’re going to look at how to make your ugly looking Squarespace form into something beautiful and on-brand. Let’s jump in!
Note: These code snippets work on Squarespace 7.0. Squarespace 7.1 give you the ability to edit form blocks which can be done in Design > Colours and Design > Fonts. For further styling, you may wish to copy and edit the relevant code blocks.
1. add in your contact form
Head to where you want your on-brand contact form to appear. In the page editor, add in a new contact form and connect your email address.
You’ll want to leave the contact form page open as we make changes in the CSS Editor.

2. Head to CSS Editor
To add in code, simply go to Design > Custom CSS in the settings on both Squarespace 7.0.
3. Add in your code
Now it’s time to add in your code snippets to jazz up your Squarespace form.
You’ll also notice that you will se the changes update in the form on the right hand side of your page as you go. This is really handy to keep an eye on as you go.
It’s a good idea to have your hex codes and brand fonts to hand. This is so you can update the copy-and-paste code snippets to match your brand.

Section 1: Background
This first section looks at the background behind your block. In this example, I’m going to add a border and a background colour to my form block.
.form-wrapper {
background:#f2f2f2;
padding:25px;
border-style:solid;
border-width:1px;
border-color:#7B666A;
}
Section 2: Titles
Next, we add in the text to target the titles of each field.
.form-wrapper .field-list .title {
color: #7B666A;
font-family: freight-neo-pro !important;
text-align: left;
text-transform: uppercase;
font-weight: 200;
font-size: 15pt;
letter-spacing: .15em !important;
} 
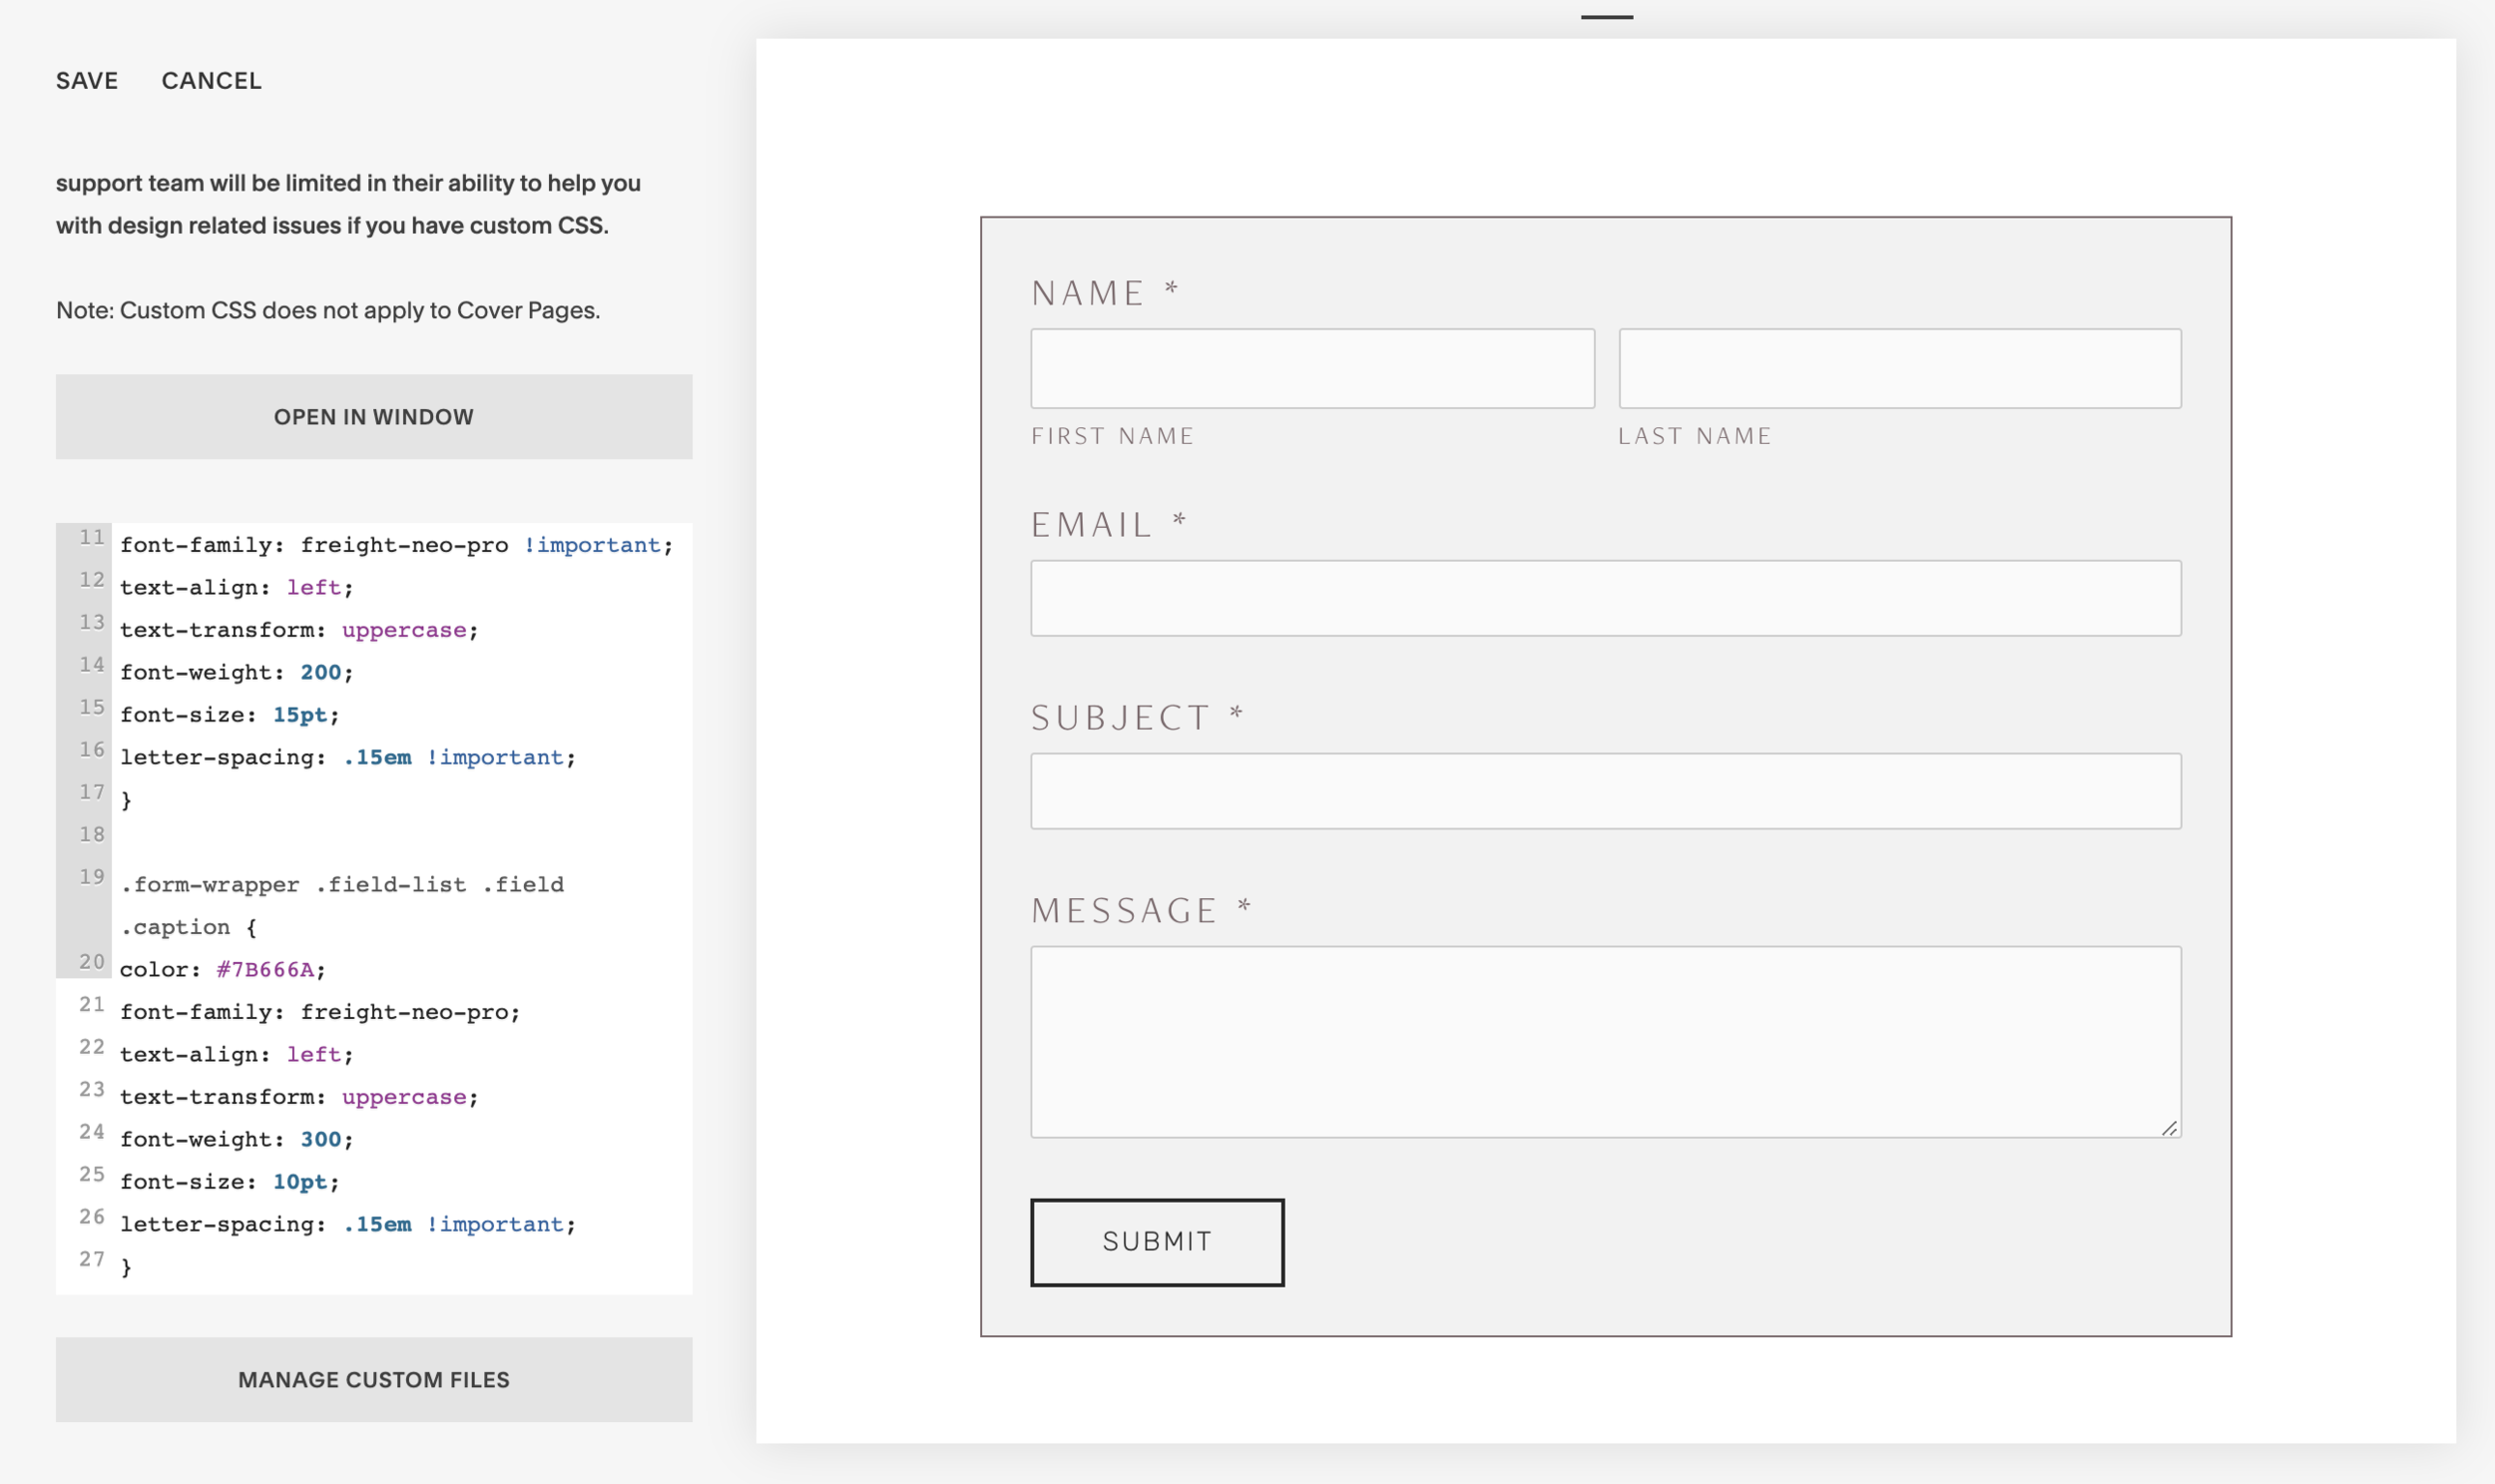
Section 3: Captions
Next up, we’ll target field captions. They’re the bit of descriptive text that sit with a field. In this example, it’s the ‘First Name’ and ‘Last Name’ labels that we see change.
.form-wrapper .field-list .field .caption {
color: #7B666A;
font-family: freight-neo-pro;
text-align: left;
text-transform: uppercase;
font-weight: 300;
font-size: 10pt;
letter-spacing: .15em !important;
}
Section 3: descriptions
This time we will target the actual descriptions of different fields. I’ve added a bit of text in the message field to show how we can target this.
.form-wrapper .field-list .description {
color: #5c5c5c;
font-family: montserrat;
text-align: left;
text-transform: none;
font-weight: 300;
font-size: 12px;
letter-spacing: 0.02em;
}
Sectio 4: Fields
In this example, I wanted to show how you can make cool effects such as the pill style fields. If you want rectangular edges, simply make the ‘border-radius’ to ‘0px’.
.form-wrapper .field-list .field .field-element {
border-style:solid;
border-width:1px;
border-color:#7B666A;
border-radius: 20px;
background: #ffffff;
}
Or try this code for a different look:
.form-wrapper .field-list .field .field-element {
border: none !important;
border-bottom: 1px solid #7B666A !important;
border-radius: 0px !important;
background: #ffffff;
}
When you’re happy, click ‘Save’ in the top left corner to make your changes live.
Remember, the button’s font and colour can be changed in the Style Editor.
It’s just a matter of copying and pasting in that code. Then it’s over to you to play around with adding in your brand fonts and colours. Pretty easy when we get into it, right?
If you’re on Squarespace 7.1, then some of the colour and font changes can be done in the Style Editor. You can add in other code snippets to snaz up your background and fields by copying in these snippets into Design > Custom CSS.
Enjoy injecting your brand into your Squarespace website’s contact form!


